The Anatomy: Single Frame Self Portrait
Stage One: Conceptualization
I started the process of conceptualizing the frame by journaling what kind of tone/mood I wanted the image to have. The words bare
and fresh, kept coming up during this process, so I knew that it would be a bare image of my face.
Pores, creases, dark circles and age spots–nothing would be cosmetically retouched. Once I had the basic idea, I began to sketch out the image and how I would incorporate the use of water, to further the notion of a bare, fresh face.
Stage Two: The Shoot
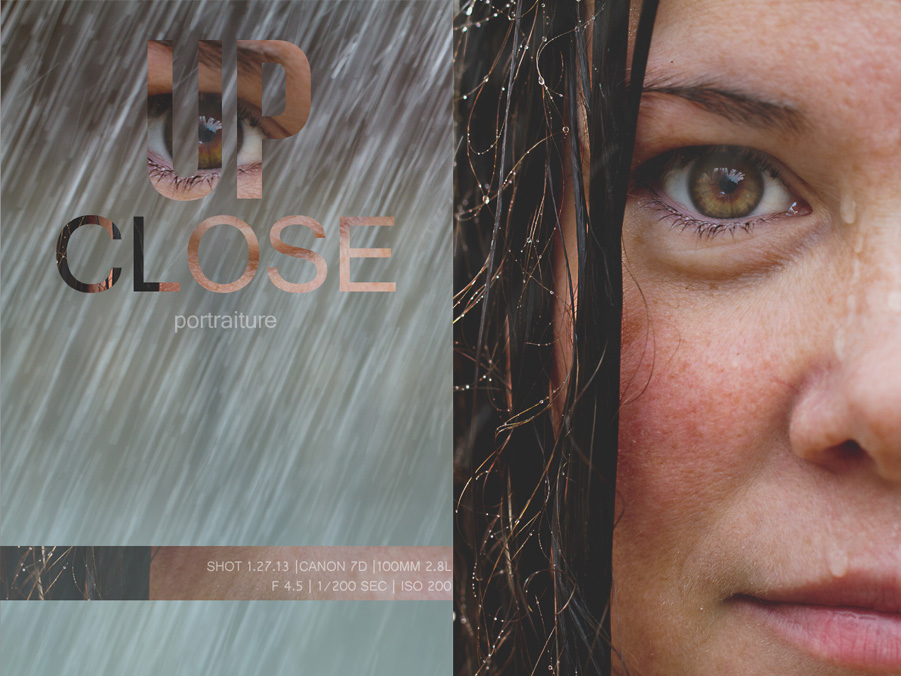
Supply list: Canon 7D and 100mm
2.8 L Lens, tripod, remote shutter, expodisc, a garden hose with an adjusting spray nozzle.
I set up the tripod and adjusted for composition, used my exposdisc to set custom white balance and to set exposure. I tested the sprayer, using my son as my assistant (my 7 year old found it very FUN to spray me with water–especially when I let out a huge scream). I underestimated how cold the water would be and how close the camera was, so I readjusted its location and settled on fixing composition in post production. I misted my wet hair first to create the beads of water and then used the full stream shower to simulate rain. This frame was taken right before I got a face and mouth full of water. Initially, I wanted to play with adjusting the shutter speed to change the effect of the rain but I was having a very hard time standing still, while being soaked with freezing cold water, so I quickly wrapped the shoot. I make for a terrible model.
Note: it started raining as we packed up the equipment–the irony.
Stage Three: Post Production
I opened the image in ACR and adjusted the exposure (the light was in and out the entire time–due to the clouds).
Once in Photoshop (CS5) I did a quick levels adjustment.
Next, I created a new merged layer and set this layer to screen. I created a layer mask and painted over the eyes with a soft brush (white) and set the layer to 50% opacity.
I created another merged layer and ran smart sharpen to bring out the details in the beads of water (sadly my hair is not over sharpened–it’s just that dry, post baby hair is the pits).
I used an adjustment layer and adjusted the contrast slider to -25.
I used two different curves layers (with masks set to multiply) to dodge and burn parts of the background, hair and skin.
*Saved Photoshop file.
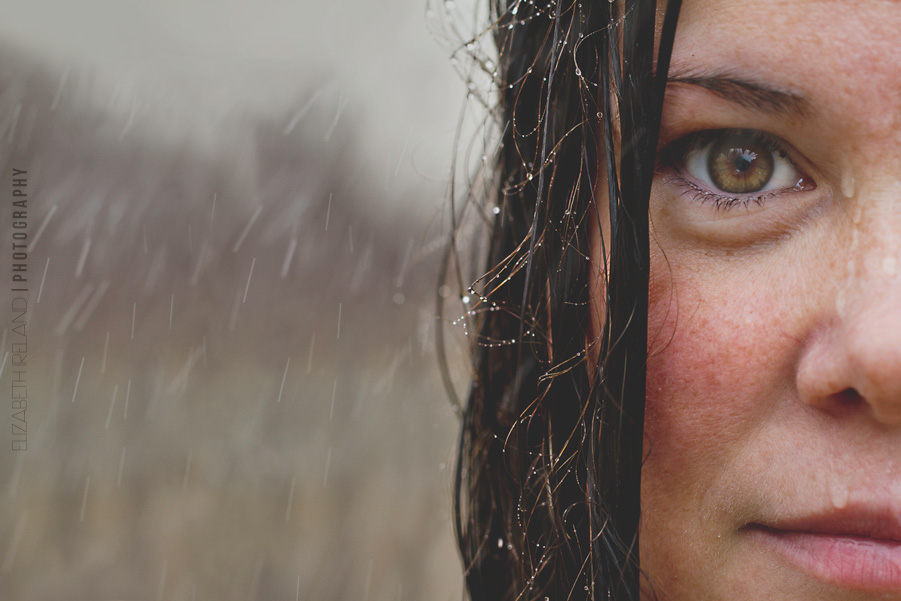
The last thing I did was to increase the amount of negative space. To do this, I used the rectangle marque tool and selected all of the image EXCEPT the camera right portion of my face, copied the selection and then pasted on a new layer. I moved the new layer all the way to the right. I now had an ugly line down the center left half of the image. I used the clone stamp (adjusting blend mode between normal, darken and lighten) to remove the crease, symmetrical rain streaks, and to blend the colors of the background. I also painted a little gray with a soft brush set at 10%-20% opacity to smooth out the sky and add a little depth. Saved for print and web.
The second image:
I opened the saved file from earlier (before I adjusted composition) in Lightroom and recomposed for a vertical image.
Saved for print and web.
The Takeaway: I would have done a few things differently, but with that being said, it was an excellent exercise in creativity. By following a single frame from conception through post production, I was able to be more conscious of when and why I make creative concessions and how to bring back that original vision in post production.

This year I am participating in a Clickin’ Moms challenge blog circle with a group of extremely talented female photographers. Next months challenge is FOOD PHOTOGRAPHY (can you tell by the all caps that I am just a little bit excited for next months challenge). I am personally challenging myself to create an original recipe and shoot it. I have this crazy fantasy of transforming Starbucks drinks into cupcakes. Think of all the yummy research I get to do! Which Starbucks drink would you like to see me turn into a cupcake?
For now, please continue our blog circle and visit Lauren Sanderson Photography and don’t forget to leave her some blog love!


 Sunset